
The IPv6 DDNS Adventure: When CGNAT Forces Your Hand
My IPv4 DDNS had been working perfectly for years until I switched ISPs. The new provider enforces CGNAT with no way out – no opt-out option, no static IP available. My public IPv4 was now shared with other customers, making direct access impossible.
I suppose it’s justifiable as the pool of IPv4 addresses keeps shrinking. It’s amazing how humanity managed to nearly deplete all available IPv4 addresses (2³² = 4,294,967,296 theoretically) in just a few decades!
My thoughts naturally turned to IPv6. There’s practically no good reason to enforce IPv6 CGNAT at all! Even the common practice of assigning dynamic IPv6 addresses for every connected device seems, in my opinion, purely designed to encourage consumers to pay for “business level” or “premium level” internet. With about 3.4 × 10³⁸ addresses available – an astronomically large number – that’s roughly 4.8 × 10²⁸ addresses for every person on Earth given our current population (which is actually stagnating, even showing trends of reduction).
So IPv6 wasn’t optional anymore – it was IPv6 or no external access at all.
The Setup
But first, why do I need to access my personal PC from the internet?! I’ve got Ubuntu WSL running on my Windows machine, and I can only execute Claude Code on it. Exposing an SSH connection to it would be ideal for my workload.
Setting expectations helps in limiting and securing the exposure of my personal home machine to the wide and wild world out there. Don’t underestimate that while you think you’re just accessing your home security camera systems or your Plex server, someone else might have been accessing them too – for as long as you have!
First things first, I needed to find a free IPv6 DDNS service. A quick Google search showed me plenty of options like DuckDNS, No-IP, and Dynu. I ended up choosing freemyip.com for its quick getting-started process, no requirement for signing up, and multiple easy ways to update my IPv6. Perfect for the automated script I had in mind.
And since I’m on my vibe-coding journey, it was only natural to ask Claude to help me out.
First Try: WSL2 Directly
Ideally, the update script should execute periodically inside my WSL instance, which is literally just an Ubuntu VM running on my Windows machine. But there were a few hurdles to overcome.
First of all, IPv6 support is “supposedly working”, but in reality, it’s not quite stable – at least not with the current WSL 2.5.9.0. I ran into multiple networking issues. The WSL GitHub issues page is full of discussions about IPv6 problems, and I encountered NAT issues that many others have reported. This pointed me towards trying the Mirrored network mode, which seemed to work better for me, but there’s no way to directly access the WSL instance in that networking mode.
Interestingly, Claude, without the “correct” context, happily suggested all the changes I could make to my WSL Ubuntu to “make it work”. I did tell Claude I was configuring my WSL instance which is Ubuntu. I guess that wasn’t specific enough then!
#!/bin/bash

# Check if verbose flag is provided
VERBOSE=false
if [ "$1" = "--verbose" ]; then
    VERBOSE=true
fi

TOKEN="[YOUR_TOKEN_HERE]"
DOMAIN="[YOUR_DOMAIN]"

# Get current IPv6 address
if [ "$VERBOSE" = true ]; then
    echo "Getting current IPv6 address..."
    IPV6=$(curl -s https://ipv6.icanhazip.com)
    echo "Current IPv6: $IPV6"
else
    IPV6=$(curl -s https://ipv6.icanhazip.com)
fi

# Check if we got a valid IPv6 address
if [ ! -z "$IPV6" ]; then
    # Build the URL with verbose parameter if needed
    if [ "$VERBOSE" = true ]; then
        URL="https://freemyip.com/update?token=$TOKEN&domain=$DOMAIN&myip=$IPV6&verbose=yes"
        echo "Updating freemyip.com with URL: $URL"
        echo "Response:"
        curl "$URL"
        echo ""
    else
        curl -s "https://freemyip.com/update?token=$TOKEN&domain=$DOMAIN&myip=$IPV6" >/dev/null 2>&1
    fi
else
    if [ "$VERBOSE" = true ]; then
        echo "Error: Could not retrieve IPv6 address"
    fi
fi
Accessing via Windows Host
Well, I needed a script to update my Windows PC’s IPv6 to freemyip.com then. I asked Claude for a PowerShell script, and it quickly wrote one for me. But I wanted it to execute periodically every 20 minutes. I don’t know why I picked that number, but for whatever reason, it seemed to be a sweet spot for my new ISP – I could see my IPv6 was dynamically reassigned sometimes twice within a 30-minute window!
As expected, the first version of Claude’s PowerShell script “worked”, in the sense that it updated freemyip.com correctly. But it tried a “smart” approach by getting the IPv6 from the current local network interface and using that value, rather than using an external service to get what IPv6 “outsiders” see us as.
The problem is my PC’s local network interface always reports a different IPv6 value from the public value the world sees. That’s probably expected behaviour since IPv6 provides a much bigger pool of addresses, so no IPv6-enabled host should worry too much about clashing addresses. From my quick research, a host just needs a network prefix package (either in /56 or /64 spaces) and can pick a random address, then use a neighbour discovery package to ensure it’s not clashing on the local network.
I had to instruct Claude to use external IPv6 all the time, by getting it from a free service like ipify.org or icanhazip.com. And now my DDNS reports the same external IPv6 I saw. Great!
Installing the DDNS update script as a task to run every 20 minutes proved to be not as straightforward in Windows as a crontab in Linux. Of course, I didn’t do it manually – I told Claude to write me a script to install my script as a task. And it failed miserably.
While the first version of the script “worked” in the sense that it created the Windows task correctly, the task itself couldn’t start. Due to Windows restrictions on user privileges, Claude couldn’t help with that. I spent half an hour but just couldn’t be bothered to spend more time “fixing” all the privileges, policies, group policies, etc. for my single home PC. Plus, the way Microsoft thinks all personal users should have a personal Microsoft account to log in to their personal PC, with “hacky” interfaces hiding the admin interfaces for managing users on local PC, just made it a bigger-than-few-minutes hurdle to overcome.
Well, I had a super coder/scripter at my command, so I told Claude to “fix it”, and it suggested installing the script as a Windows Service. It ran wild after that, providing me with at least four versions with broken code (broken syntax, unclosed quoted strings, etc.). It couldn’t seem to recognise where it went wrong and fix itself. I’m not sure if this called for a “Subject Matter Expert” to step in.
Skimming through the code, I could tell which lines were having problems, and just by prompting Claude to fix line XX and XX, it fixed itself! Maybe this is another form of “hallucination”? It thought whatever it wrote couldn’t be broken syntactically?
Windows Service didn’t work either. To be fair, the script worked if it is executed manually in a PowerShell terminal. It was some configuration in Windows preventing the script from executing. I asked Claude to think harder and fix the issue – of course, I pasted what I saw in the Event Viewer log. And it kind of had an “ah-ha” moment, then proceeded to rewrite the script back to a Task Scheduler task, but this time it worked!
Here’s the final working PowerShell script that successfully created a task to update my IPv6 every 20 minutes to freemyip.com. You can download the complete script: IPv6DDNSService.ps1
Here comes the last hurdle:
Come the World of Firewalls and Port Forwarding
I’m no stranger to port forwarding and firewall configuration, but it still took me about an hour to get everything working the way I wanted.
First things first, I couldn’t ping my IPv6 DDNS, but shortly after I found out I needed ping -6 (to route through IPv6). Then I needed to set up SSH in my WSL, and I wanted OTP for the SSH connection. I’d done this a few times with my personal VPS but hadn’t bothered to keep documentation of how I did it.
Setting up OpenSSH with 2FA
Setting up SSH with Google Authenticator 2FA was straightforward - I just asked Claude for the commands and it walked me through installing openssh-server and libpam-google-authenticator, configuring PAM, and updating the SSH daemon settings. The whole process took about 5 minutes, and everything worked on the first try.
If you need to do something similar, just ask your AI assistant for a step-by-step guide - it’s often quicker and more tailored than hunting through Google!
Handle Ubuntu 22.10+ systemd socket activation
Here’s where I hit a snag! Starting from Ubuntu 22.10, OpenSSH uses systemd socket activation by default, which caused some confusion during my WSL setup when restarting sshd kept failing. Instead of the traditional service management, SSH is now managed through systemd sockets.
If you’re running into issues (like I did), check out this Ubuntu Discourse thread that explains the change.
For me I don’t really need to save 3MiB per intance, I have plenty, so I just disabled ssh.socket
systemctl disable --now ssh.socketrm -f /etc/systemd/system/ssh.service.d/00-socket.confrm -f /etc/systemd/system/ssh.socket.d/addresses.confsystemctl daemon-reloadsystemctl enable --now ssh.serviceFirewall Configuration
Now I needed to make sure my WSL2 instance was accessible from my Windows host. No matter what I tried, even though the WSL2 instance reported an IPv6 value internally, there was no way to connect to it using IPv6 – all attempts failed. I started to get frustrated. I couldn’t admit failure after all this work, right?
I was ready to pay for a static IPv4, but my ISP didn’t even make it an option for my “home internet plan”. Its AI chatbot suggested I needed to upgrade to a “premium business plan” to avoid CGNAT and get a static IP.
A thought ran through my brain: if IPv6 doesn’t work, maybe IPv6 to IPv4 would? A quick Google search confirmed my thought – it should work. I told Claude, and it gave me the correct netsh command to execute on my Windows host to forward a port from my external IPv6 to my internal IPv4 of the WSL instance!
The last steps were, of course, opening up the Windows Firewall and the router’s firewall for the port to work. Mentally, I’m aware that my network topology is quite simple: a local router connecting to the ISP’s network via NBN, and the router then assigns IPs to my local devices. So there were only two more hops I needed to configure. It still took some time though, since there’s no easy way to verify at which firewall the external connection was blocked. And Claude couldn’t help with that anyway.
Here’s the complete firewall configuration process I followed:
1. First - WSL Ubuntu UFW
# Enable UFW if not already enabledsudo ufw enable
# Allow SSH on your chosen portsudo ufw allow 22/tcp  # or whatever port you chose
# Check the statussudo ufw status verbose
2. Second - Windows Port Forwarding
Since WSL2 doesn’t directly support IPv6, we need to forward IPv6 traffic to WSL’s IPv4 address:
# Run PowerShell as Administrator
# Get WSL2 IP address$wslIP = (wsl hostname -I).Split()[0]Write-Host "WSL IP: $wslIP"
# Set up port forwarding from Windows IPv6 to WSL IPv4# This forwards port 2222 on IPv6 to port 22 on WSLnetsh interface portproxy add v6tov4 listenport=2222 listenaddress=:: connectport=22 connectaddress=$wslIP
# Verify the port proxy is set upnetsh interface portproxy show all
3. Third - Windows Firewall Rules
Create firewall rules to allow incoming connections:
# Run PowerShell as Administrator
# Create inbound rule for IPv6 SSH accessNew-NetFirewallRule -DisplayName "SSH IPv6 Access" ` -Direction Inbound ` -Protocol TCP ` -LocalPort 2222 ` -Action Allow ` -Profile Any ` -RemoteAddress Any
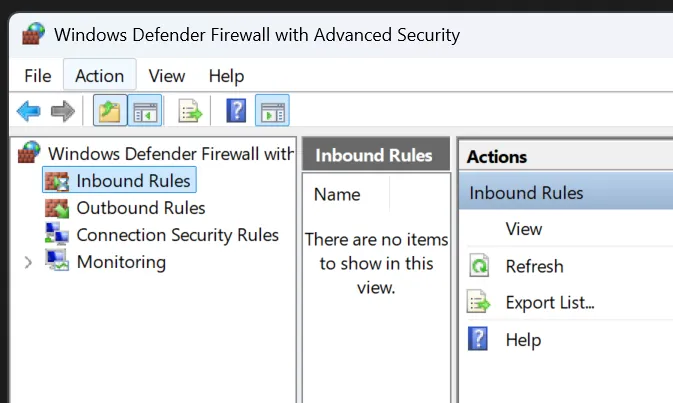
# Alternative method using netsh (if New-NetFirewallRule doesn't work)netsh advfirewall firewall add rule name="SSH IPv6 Access" ` dir=in action=allow protocol=TCP localport=2222 ` profile=any remoteip=anyOr just create an Inbound rule on Windows Firewall
4. Fourth - Router Configuration
In my case, I’m using an ASUS router with Asuswrt-Merlin firmware. Every router is different, but here are the general steps:
- Log into router’s admin panel (usually 192.168.1.1 or 192.168.0.1)
- Navigate to IPv6 under Advanced Settings
- Note down the LAN IPv6 Address and the Prefix Length
- Add a new rule in Firewall, also under Advanced Settings
- Service Name: SSH Access (or any descriptive name)
- Protocol: TCP
- Port Range: 2222 (or your chosen port)
- Local IP: Sommething like this
e522:6e65:4b34:3ab1::1/56
- Apply/Save the settings
A note on my IPv6 range choice: You might wonder why I opened a whole /56 subnet instead of a single IPv6 address. Here’s the thing – Windows has this “helpful” feature called IPv6 Privacy Extensions that generates new temporary addresses every 24 hours. I could disable it and use a static IPv6, but I went with the lazy option: open the port for my entire subnet range.
Is it the most secure approach? Definitely not. But since my Windows PC is the only one device using IPv6 on my home network (everything else is still happily on IPv4), the risk is minimal. Plus, it saves me from future troubleshooting sessions when Windows decides to play musical chairs with its IPv6 addresses.
Troubleshooting Tips:
- If connection times out, check each firewall layer one by one
- Use
tcpdumporwiresharkto see where packets are being dropped - Temporarily disable Windows Firewall to isolate issues
- Check if your ISP blocks common ports (some block 22, try 2222 or higher)
- Ensure your router has IPv6 enabled and properly configured
In the end, after configuring all four firewall layers, everything finally worked! As I write this, I’m SSH’d into my WSL instance from a coffee shop, typing away in nvim through Termius. The IPv6 DDNS updates reliably every 20 minutes, and my connection has been rock solid.
This whole adventure took me from IPv4 nostalgia through IPv6 confusion to a working solution. If you’re facing similar CGNAT woes, I hope this helps you find your own path through the maze of firewalls and port forwarding. Sometimes the solution isn’t pretty, but hey – if it works, it works!
Key Takeaways
- IPv6 is increasingly becoming the only option for home users due to IPv4 depletion and CGNAT
- WSL2’s IPv6 support is still a bit wonky, but there are workarounds
- Sometimes the solution isn’t fixing what’s broken, but finding an alternative path (IPv6 to IPv4 forwarding)
- Having an AI assistant is great, but knowing when to guide it is crucial
- Document your setup – future you will thank present you!